FRAME WORK
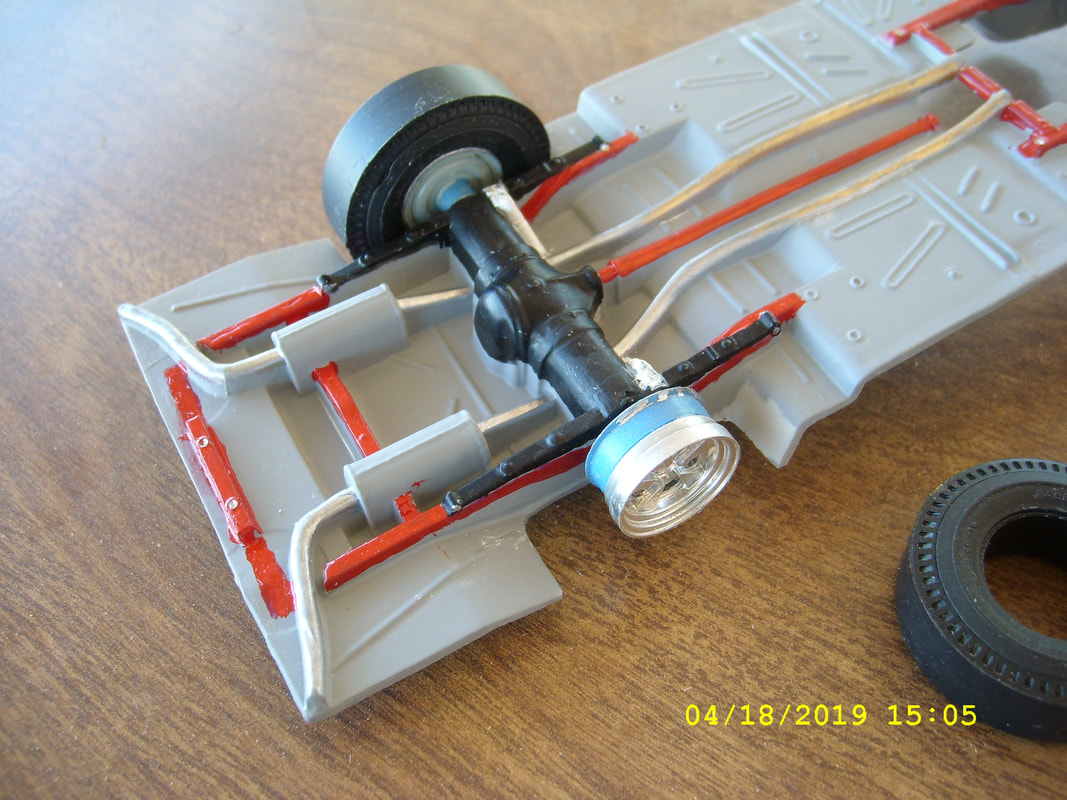
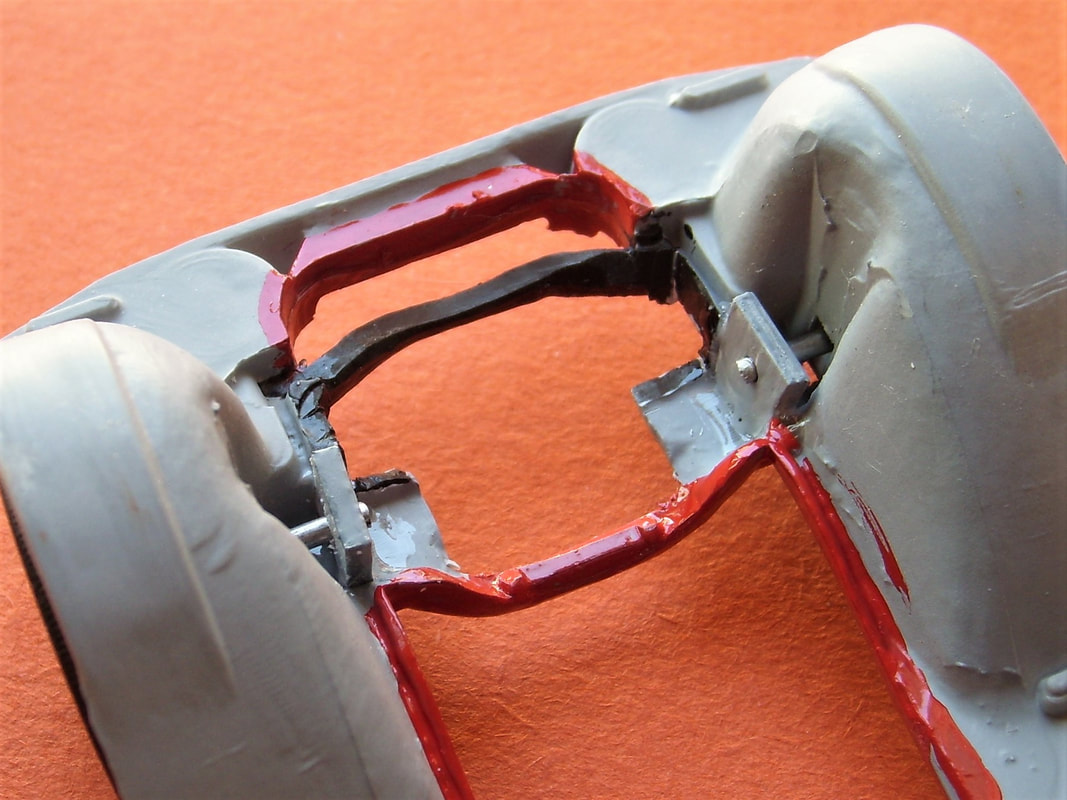
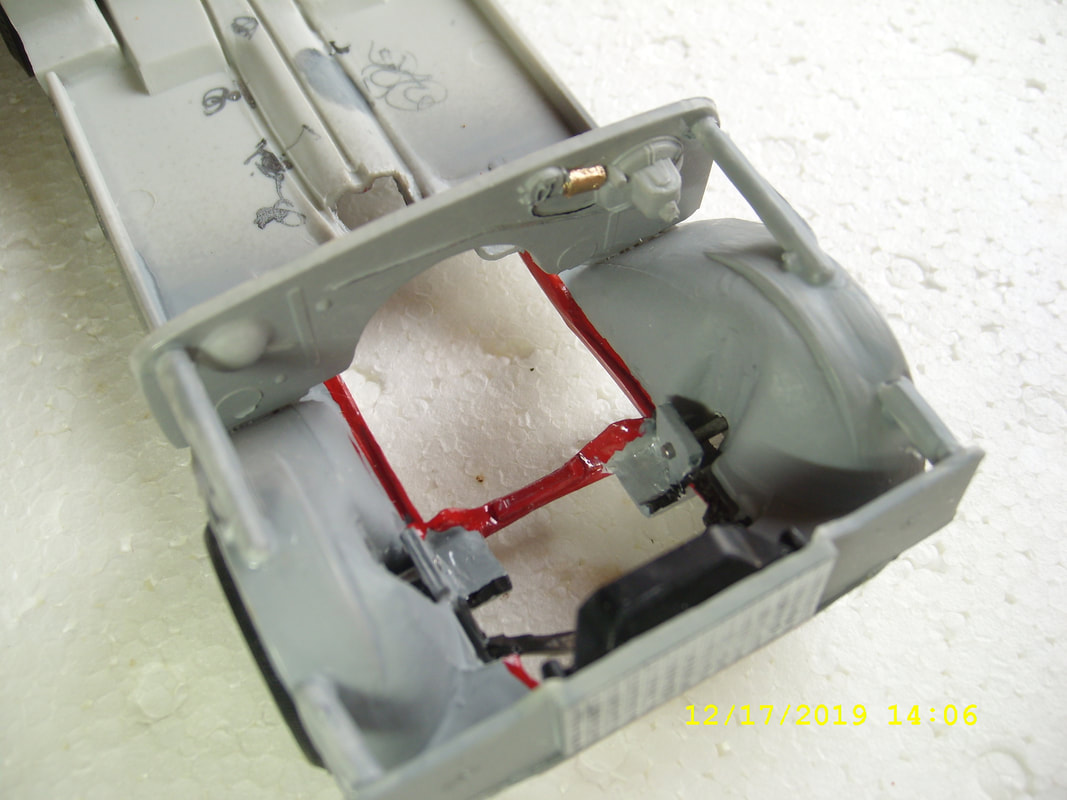
Here we will take a little closer look at the frame detail and mods. This kit is not a good example of detail underneath. The rear end (below) is just disproportionate (fat). I would normally cut it out and put in one from another better kit. The front end has no detail at all. Just an unrealistic axle running through the motor (below right). I will cut the axle to just big enough to hold the wheel and glue it to the blocks I have installed. See black square and a little bit of the white block. I need to paint both undercoat gray to match. As you can see, I painted in the springs and some frame. Note that you can zoom in to see better on most of my images.
Here we will take a little closer look at the frame detail and mods. This kit is not a good example of detail underneath. The rear end (below) is just disproportionate (fat). I would normally cut it out and put in one from another better kit. The front end has no detail at all. Just an unrealistic axle running through the motor (below right). I will cut the axle to just big enough to hold the wheel and glue it to the blocks I have installed. See black square and a little bit of the white block. I need to paint both undercoat gray to match. As you can see, I painted in the springs and some frame. Note that you can zoom in to see better on most of my images.
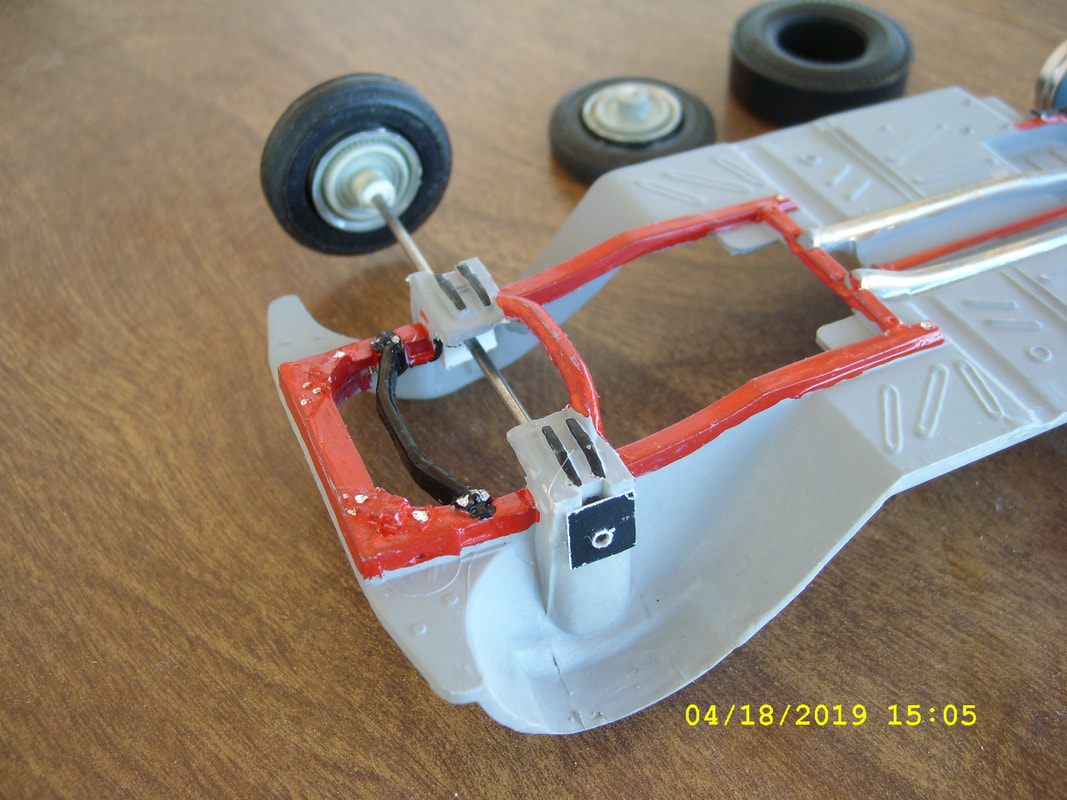
Below are pictures of the top front and rear. You can see the added white blocks to hold the axle. Not much to look at in the rear but I did have to make a slight mod. See the pins sticking up at the very tail of the frame. The lower one was broken off so I made one and glued it on. It is slightly whiter because it was from another kits "parts tree". This is an example of the hidden work that is needed, like fixing deformities, cutting off "flash" and improving detail. It all makes a better model.
Note the blocks mentioned before. The area inside the blocks on the stock frame interfered with the alternators on the engines so I had to cut away quite a bit.
Note the blocks mentioned before. The area inside the blocks on the stock frame interfered with the alternators on the engines so I had to cut away quite a bit.
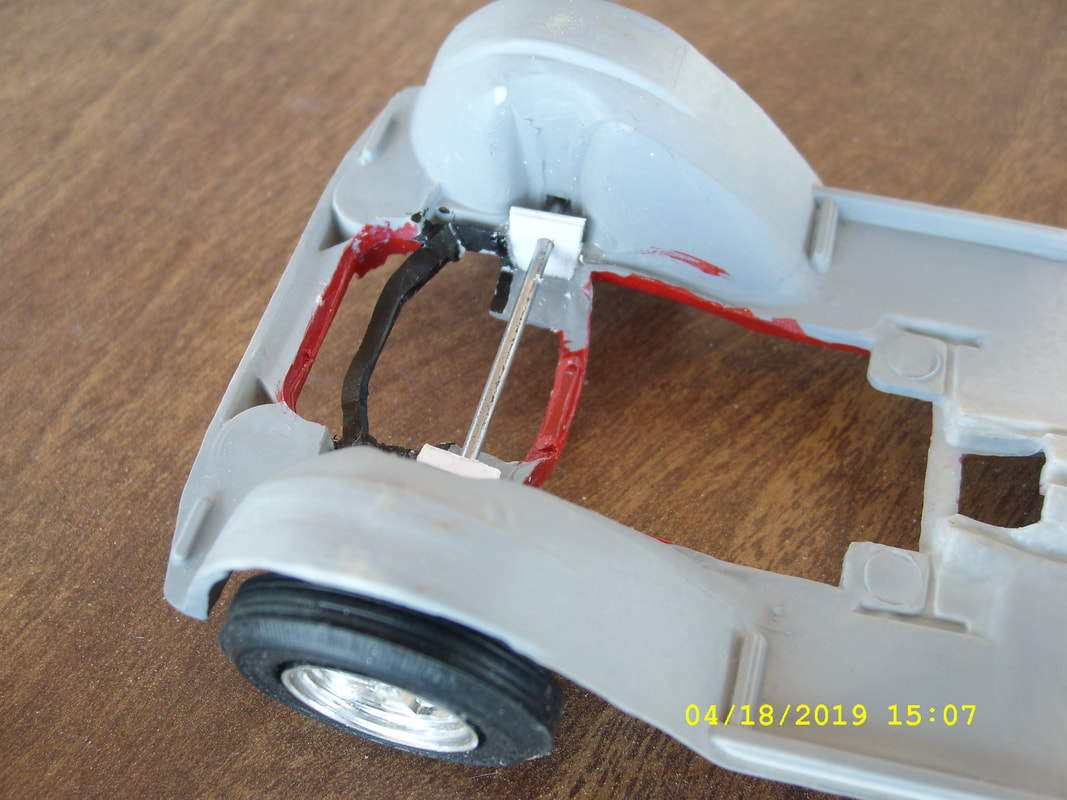
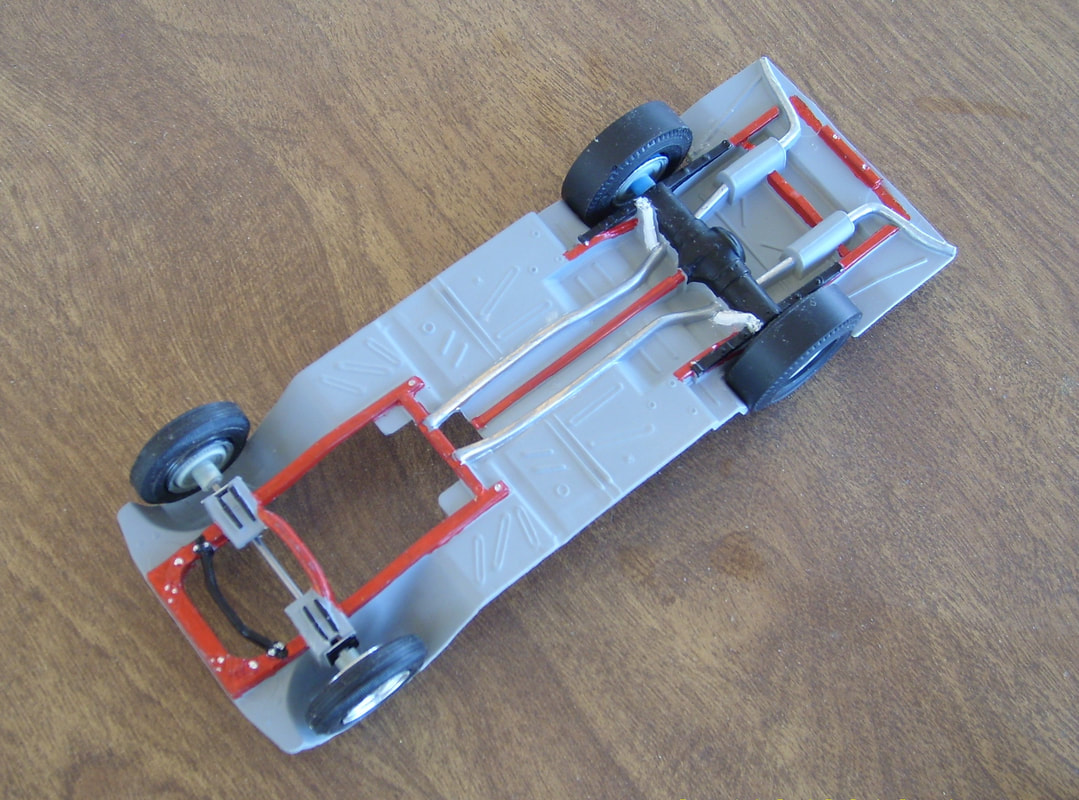
Above left is the front end with the Axel cut so I cant put the motors in easily..To the right is the nearly finished frame. All it needs is a little touch up paint and glue the wheels on. Remember, they will not turn as it is not worth the effort for a static display unless you really want to show off. Then you make the wheels stear, open doors and tail gate and go wild. At MUCH time and effort.
On the left, above, the engine bay is more complete. I added some struts to hold the front and back bulkheads. Note again the tiny blocks just in front of the red cross member. I glued these in and drilled a hole in each so the axle could run through (see above). Then I cut the axle into 2 pieces that now do not pass through the engine. Now I can replace the engines without removing the wheels and axle. I have to make the frame removable so I can replace the engines. That also means the bumper/grill needs to be removable too.
The right picture above shows the grill I had to modify to make it replaceable. I wanted to be able to lift the body off the frame as needed. The Grill needed to be attached to the front bulkhead and had some struts ready to glue on. See the protrusions behind the headlights? I drilled a hole (0.020 inches, IE 20 thousandths of an inch) diameter and put some short pieces of fine wire into the holes. Then I carefully drilled slightly bigger holes in the bulkhead. You can not see the holes on the bulkhead pictured at left because of the angle. Now I can quickly remove or install the grill. If I want, I can glue it for a final configuration.
The right picture above shows the grill I had to modify to make it replaceable. I wanted to be able to lift the body off the frame as needed. The Grill needed to be attached to the front bulkhead and had some struts ready to glue on. See the protrusions behind the headlights? I drilled a hole (0.020 inches, IE 20 thousandths of an inch) diameter and put some short pieces of fine wire into the holes. Then I carefully drilled slightly bigger holes in the bulkhead. You can not see the holes on the bulkhead pictured at left because of the angle. Now I can quickly remove or install the grill. If I want, I can glue it for a final configuration.
